
 продукта -




Електронни интерфейси

Адаптер ISO при смяна на фабричното радио с ново за AUDI с активна система BOSE говорители - 4 канала. Съвместима с Audi A3, A4, A6, A8 и Audi TT
Цена: 71.5 лв. / 36.56 €

Интерфейс за контрол на грешките на превозни средства с CAN-BUS.
· Удължава живота на LED лампите
· Елиминира предупредителните светлини на таблото
· Мощност: 5/21 W
Цена: 77 лв. / 39.37 €
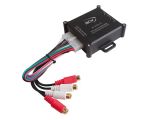
Преход от високо / от тонколоните / към ниско ниво / RCA / + remote control
High-Level adapter 4-channel remote 150W RMS max. Premium
Цена: 77 лв. / 39.37 €
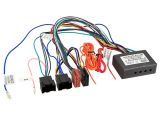
Active system adapter Cadillac/Saab 14Pin/16Pin>ISO
connector: 14 Pin / 16 Pin Saab plug > ISO plug
output: OEM amplified system 4 channel adjustable
blue: +12V Amp remote
blue/black: +12V remote out
red: +12V ignition clamp 15 fusebox fused 10A max.
orange: dimmer clamp 58
vehicles with Fujitsu Ten OEM HU
vehicles without Denso OEM Sat Nav*
Vehicle applictation:
Cadillac
Cadillac BLS 2006 - 2012
Saab
Saab 9-3 (YS3F) 2006 - 2014
Saab 9.5 (YS3E) 09/2005 - 02/2011*
Цена: 79.99 лв. / 40.90 €

Necessary interfaces on vehicles with CAN-BUS anomalies control.
· Extension of LED bulbs lifetime
· Elimination of dashboard warning light anomalies
· Perfect lighting system
Цена: 85 лв. / 43.46 €

Necessary interfaces on vehicles with CAN-BUS anomalies control.
· Extension of LED bulbs lifetime
· Elimination of dashboard warning light anomalies
· Perfect lighting system
Цена: 85.07 лв. / 43.50 €

Аксесоарът F4IN е разширителна платка за аналогов вход, съвместима усилвателите Audison AF с вграден Dsp. Картата се поставя в специалния външен слот на AF усилвателя и добавя четири аналогови високоволтови входни канала към осемте на AF усилвателя, като по този начин достига общо дванадесет входа на високо ниво (SPK IN). По отношение на диапазона на чувствителност на оригиналните осем SPK IN входа (2,2 ÷ 22 VRMS), F4IN разполага с 3,2 ÷ 32 VRMS, за да позволи перфектна интеграция в усъвършенствани OEM системи с по-високи напрежения.
Характеристики
F4IN разполага с 3,2 ÷ 32 VRMS, за да позволи перфектна интеграция в усъвършенствани OEM системи с по-високо напрежение.
F4IN може да бъде идеалното решение за инсталации в OEM системи като:
Audi A5/S5 2015 с B&O за Subwoofer
Audi Q5 с B&O за субуфер
Audi A6 4G с Bose за Subwoofer
Повечето БМВ с H/K система за Subwoofer
Porsche Cayenne 2018 с Bose за Subwoofer
Skoda Octavia 2022 с Canton за Subwoofer
Volvo FH12 с OEM субуфер DVC 8+8 Ohm
Цена: 88.01 лв. / 45.00 €

мултифункционален програмируем модул за управление на авторадиокасетофони и USB плейъри на Pioneer. Kenwood. SONY. JVC, Alpine
от фабричните бутони на волана на автомобили от различни модели моделите
Цена: 89 лв. / 45.50 €

analog
connector: ISO / Mini ISO
for vehicles on year of construction limit > item: 42a-1180-00c with ISO/Mini ISO and 24Pin/18Pin wiring harness
check dip switches for retrofit HU
blue/white: +12V Amp remote
vehicles without OEM amplified system CAN Bus controlled
diagnostic LED:
blue constant > Interface active +12V ignition power supply present
red > steering wheel remote control button function recognised
Vehicle application:
Hyundai
Hyundai i10 (PA) 10/2008 - 12/2010
Hyundai i10 (PA) 01/2011 - 10/2013
Hyundai i20 (PB) 04/2009 - 06/2012
Hyundai i20 (PB) 07/2012 - 11/2014
Hyundai i30 (FD/FDH) 09/2007 - 10/2010
Hyundai ix20 (JC) 11/2010 - 07/2015*
Hyundai ix20 (JC) 08/2015 - 07/2019*
Hyundai Santa Fé (CM) 01/2010 - 09/2012
Hyundai Sonata (NF) 08/2008 - 03/2010
Kia
Kia Carens (BK) 10/2006 - 03/2013
Kia Cerato 2009 - 2013
Kia Carnival (VQ) 06/2006 - 12/2009
Kia Cee·d (ED) 10/2009 - 03/2013
Kia Pro-Ceed (ED) 10/2009 - 06/2012
Kia Sorento (JC) 07/2006 - 09/2009
Kia Sorento (XM) 10/2009 - 10/2012
Kia Soul (AM) 02/2009 - 09/2011
Kia Soul (AM) 09/2011 - 03/2014
Kia Venga (YN/YNS) 02/2010 - 01/2015
Kia Venga (YN/YNS) 01/2015 - 08/2019
Following signals are provided:
Reimported vehicles or vehicles with different software may be incompatible in functions.
SWC
*vehicles with OEM Sat Nav
HU application:
Multilead different HU > item: 42arc100
General installation instructions:
Verification:
1: Check all operating functions and vehicle setting functions of the OEM HU.
2: Disconnect the OEM HU voltage-free.
3: Check all interface connections for correctness voltage-free.
Connection and connection sequence:
1: Check settings and hardware configuration of the interface voltage-free.
2: Check configuration of the HU connection cable voltage-free.
3: Connect the HU connection cable according to the operating instructions of the retrofit HU.
4: Connect all other connections according to the operating instructions of the retrofit HU.
5: Connect the entire installation to the vehicle with the main connection last.
6: Software configuration of the interface according to the instructions in the item text and in the manual.
7: Configure the retrofit HU according to the operating instructions of the retrofit device steering wheel remote control/camera/handsfree kit/antenna phantom powering and others.
8: Function test of steering wheel remote control and vehicle
Changes to the configuration of the interface and the HU connection cable:
1: Change configuration voltage-free
2: Reconnection see above 5 to 8
In case of malfunction of the interface or the vehicle:
1: Reinstall the OEM HU
2: Operate the OEM HU
3: Establish CAN bus shut down
4: Check the hardware configuration of the interface
5: Reconnection after CAN Bus shut down see above 5 and 6
More connections, connection changes, alternative connections, connections of loose cables or connection extensions of loose cables specified in the information text or the manual are for orientation purposes only and for the information of trained specialist installer.
More connections, changes to the cable configuration of the wiring harness or use of alternative connections or connection extensions:
1: Connections and changes are to be carried out exclusively by trained specialist installer.
2: Connections and modifications must be checked before connection for any manufacturer approvals or manufacturer warranty conditions that may be affected by the modifications.
3: Connections and modifications must be checked for function and correctness by measuring and comparing them with the vehicle·s cable assignment diagram before connection.
4: Connections and modifications are made on the user·s own responsibility without guarantee of function.
5: Connections and modifications are made on the user·s own responsibility without any guarantee of damage to the vehicle, the retrofit device or the interface.
6: Modifications to the pre-assembled wiring harness may invalidate the product·s warranty.
Цена: 97.77 лв. / 49.99 €

Note:
analog
connector: 24 Pin / 18 Pin Hyundai
for vehicles on year of construction limit > item: 42a-1180-00c with ISO/Mini ISO and 24Pin/18Pin wiring harness
check dip switches for retrofit HU
vehicles without OEM amplified system
vehicles without OEM Sat Nav
vehicles with OEM Sat Nav:
SWC Hyundai/Kia vehicles 24Pin/18Pin OEM Sat Nav > item: 42a-1180-004-nav
vehicles with different Pin assignments and vehicles with OEM Sat Nav:
check the Pin assignment before connecting to avoid faults or defects on the vehicle or the retrofit device
diagnostic LED:
blue constant > Interface active +12V ignition power supply present
red > steering wheel remote control button function recognised
Vehicle application:
Hyundai
Hyundai Azera 2011 - 2017
Hyundai Elantra 2011 - 2015
Hyundai H350 06/2015 -12/2019
Hyundai i10 (IA) 11/2013 - 12/2016
Hyundai i10 (IA) 01/2017 - 12/2019*
Hyundai i20 (GB) 12/2014 - 06/2018*
Hyundai i20 (GB) 07/2018 -09/2020*
Hyundai i30 (GD/GDH) 03/2012 - 05/2015
Hyundai i30 (GD/GDH) 05/2015 - 05/2017
Hyundai i40 (VF) 09/2011 - 05/2015
Hyundai i40 (VF) 05/2015 - 08/2018*
Hyundai i40 (VF) 10/2018 - 07/2019*
Hyundai i45 2009 - 2014
Hyundai i800 2007 - 2021*
Hyundai ix20 (JC) 11/2010 - 07/2015***
Hyundai ix20 (JC) 08/2015 - 07/2019***
Hyundai ix35 (EL) 03/2010 - 09/2013
Hyundai ix35 (EL) 09/2013 - 07/2015
Hyundai ix45 2013 - 2018*
Hyundai Santa-Fe (DM) 10/2012 - 11/2015
Hyundai Santa-Fe (DM) 12/2015 - 08/2018*
Hyundai Sonata (YF) 2009 - 2014
Hyundai Tucson (TL) 04/2010 - 06/2015
Hyundai Tucson (TL) 07/2015 - 07/2018**
Hyundai Tucson (TL) 07/2018 - 12/2020**
Kia
Kia Cee'd (JD) 06/2012 - 09/2015
Kia Forte 2012 - 2016
Kia Optima (TF) 06/2012 - 10/2013
Kia Optima (TF) 10/2013 - 10/2015
Kia Picanto (TA) 09/2011 - 04/2015
Kia Picanto (TA) 04/2015 - 03/2017
Kia Pro-Cee'd (JD) 07/2013 - 09/2015
Kia Rio (UB) 09/2011 - 01/2015
Kia Soul (AM) 09/2011 - 03/2014
Kia Soul (PS) 03/2014 - 11/2016
Kia Sorento (XM) 10/2012 - 03/2015
Kia Sportage (SL) 08/2010 - 03/2014
Kia Sportage (SL) 03/2014 - 01/2016
Following signals are provided:
Reimported vehicles or vehicles with different software may be incompatible in functions.
SWC
*vehicles 2016> without OEM Sat Nav
**vehicles with Continental OEM Sat Nav
***vehicles without OEM Sat Nav
***vehicles with OEM Sat Nav > item: 42a-1180-002
HU application:
Multilead different HU > item: 42arc100
General installation instructions:
Verification:
1: Check all operating functions and vehicle setting functions of the OEM HU.
2: Disconnect the OEM HU voltage-free.
3: Check all interface connections for correctness voltage-free.
Connection and connection sequence:
1: Check settings and hardware configuration of the interface voltage-free.
2: Check configuration of the HU connection cable voltage-free.
3: Connect the HU connection cable according to the operating instructions of the retrofit HU.
4: Connect all other connections according to the operating instructions of the retrofit HU.
5: Connect the entire installation to the vehicle with the main connection last.
6: Software configuration of the interface according to the instructions in the item text and in the manual.
7: Configure the retrofit HU according to the operating instructions of the retrofit device steering wheel remote control/camera/handsfree kit/antenna phantom powering and others.
8: Function test of steering wheel remote control and vehicle
Changes to the configuration of the interface and the HU connection cable:
1: Change configuration voltage-free
2: Reconnection see above 5 to 8
In case of malfunction of the interface or the vehicle:
1: Reinstall the OEM HU
2: Operate the OEM HU
3: Establish CAN bus shut down
4: Check the hardware configuration of the interface
5: Reconnection after CAN Bus shut down see above 5 and 6
More connections, connection changes, alternative connections, connections of loose cables or connection extensions of loose cables specified in the information text or the manual are for orientation purposes only and for the information of trained specialist installer.
More connections, changes to the cable configuration of the wiring harness or use of alternative connections or connection extensions:
1: Connections and changes are to be carried out exclusively by trained specialist installer.
2: Connections and modifications must be checked before connection for any manufacturer approvals or manufacturer warranty conditions that may be affected by the modifications.
3: Connections and modifications must be checked for function and correctness by measuring and comparing them with the vehicle's cable assignment diagram before connection.
4: Connections and modifications are made on the user's own responsibility without guarantee of function.
5: Connections and modifications are made on the user's own responsibility without any guarantee of damage to the vehicle, the retrofit device or the interface.
6: Modifications to the pre-assembled wiring harness may invalidate the product's warranty.
Цена: 97.77 лв. / 49.99 €

Note:
analog
connector: 10 Pin / 6 Pin / 20 Pin Toyota
vehicles with Matsushita / Fujitsu Ten OEM HU
vehicles without JBL / JBL Synthesis / Mark Levinson OEM amplified system
vehicles with 18 Pin CN 700 LAN connector:
steering wheel remote control on the 8 Pin CN 800 connector check before connecting it to the OEM device by measuring
Pin 6: SWC GND
Pin 7: SWC 1
Pin 8: SWC 2
diagnostic LED:
blue constant > Interface active +12V ignition power supply present
red > steering wheel remote control button function recognised
Vehicle application:
Lexus
Lexus IS (XE1) 10/2001 - 11/2005
Lexus IS (XE2) 12/2005 - 11/2008
Lexus IS Cabriolet (XE2) 07/2009 - 11/2010
Lexus IS (XE2) 11/2008 - 11/2010
Lexus IS Cabriolet (XE2) 11/2010 - 10/2013
Toyota
Toyota 4Runner 2002 - 2009
Toyota Auris (E150) 07/2007 - 03/2010
Toyota Avanza 2003 - 2011
Toyota Avensis (T25) 01/2003 - 06/2006
Toyota Avensis (T25) 06/ 2006 - 01/2009
Toyota Avensis (T27) 01/2009 - 12/2011
Toyota Camry 2007 - 2011
Toyota Celica (T23) 10/1999 - 01/2006
Toyota Corolla (E120) 01/2002 - 07/2004
Toyota Corolla (E120) 07/2004 - 02/2007
Toyota Corolla Verso (R1) 05/2004 - 06/2007
Toyota Corolla Verso (R1) 07/2007 - 04/2009
Toyota Estima 2006 - 2016
Toyota FJ Cruiser 2001 - 2007
Toyota Hiace (H1) 11/2006 - 10/2010
Toyota Hilux (N25) 10/2005 - 11/2008
Toyota Hilux (N25) 11/2008 - 12/2011
Toyota Innova 2006 - 2015
Toyota Landcruiser (J12) 01/2003 - 01/2009
Toyota Matrix 2003 - 2014
Toyota MR2 (W3) 04/2000 - 03/2003
Toyota Prado 2003 - 2009
Toyota Previa 2006 - 2019
Toyota Prius ZVW30/ZVW35 (XW3) 06/2009 - 04/2012
Toyota RAV4 (XA2) 10/2000 - 12/2003
Toyota RAV4 (XA2) 12/2003 - 01/2006
Toyota RAV4 (XA3) 03/2006 - 04/2009
Toyota RAV4 (XA3) 04/2009 - 05/2010
Toyota Yaris (XP9) 01/2006 - 01/2009
Toyota Yaris (XP9) 01/2009 - 10/2011
Toyota Vios 2003 - 2007
SWC
HU application:
Multilead different HU > item: 42arc100
General installation instructions:
Verification:
1: Check all operating functions and vehicle setting functions of the OEM HU.
2: Disconnect the OEM HU voltage-free.
3: Check all interface connections for correctness voltage-free.
Connection and connection sequence:
1: Check settings and hardware configuration of the interface voltage-free.
2: Check configuration of the HU connection cable voltage-free.
3: Connect the HU connection cable according to the operating instructions of the retrofit HU.
4: Connect all other connections according to the operating instructions of the retrofit HU.
5: Connect the entire installation to the vehicle with the main connection last.
6: Software configuration of the interface according to the instructions in the item text and in the manual.
7: Configure the retrofit HU according to the operating instructions of the retrofit device steering wheel remote control/camera/handsfree kit/antenna phantom powering and others.
8: Function test of steering wheel remote control and vehicle
Changes to the configuration of the interface and the HU connection cable:
1: Change configuration voltage-free
2: Reconnection see above 5 to 8
In case of malfunction of the interface or the vehicle:
1: Reinstall the OEM HU
2: Operate the OEM HU
3: Establish CAN bus shut down
4: Check the hardware configuration of the interface
5: Reconnection after CAN Bus shut down see above 5 and 6
More connections, connection changes, alternative connections, connections of loose cables or connection extensions of loose cables specified in the information text or the manual are for orientation purposes only and for the information of trained specialist installer.
More connections, changes to the cable configuration of the wiring harness or use of alternative connections or connection extensions:
1: Connections and changes are to be carried out exclusively by trained specialist installer.
2: Connections and modifications must be checked before connection for any manufacturer approvals or manufacturer warranty conditions that may be affected by the modifications.
3: Connections and modifications must be checked for function and correctness by measuring and comparing them with the vehicle·s cable assignment diagram before connection.
4: Connections and modifications are made on the user·s own responsibility without guarantee of function.
5: Connections and modifications are made on the user·s own responsibility without any guarantee of damage to the vehicle, the retrofit device or the interface.
6: Modifications to the pre-assembled wiring harness may invalidate the product·s warranty.
Цена: 97.77 лв. / 49.99 €
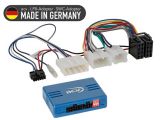
analog
connector: 10Pin / 6Pin / 28Pin Toyota
vehicles with Matsushita / Fujitsu Ten OEM HU
vehicles without 360° OEM camera system
diagnostic LED:
blue constant > Interface active +12V ignition power supply present
red > steering wheel remote control button function recognised
Vehicle application:
Toyota Auris (E150) 03/2010 - 01/2013
Toyota Avensis (T27) 01/2012 - 06/2015
Toyota Corolla (E170) 04/2014 - 12/2016
Toyota Fortuner 2011 - 2015
Toyota Hilux (N25) 12/2011 - 08/2016
Toyota Hilux (AN1P) 11/2016 - 09/2020
Toyota Hilux (AN1P) 10/2020 - 2025***
Toyota Innova 2011 - 2015
Toyota Prius ZVW30/ZVW35 (XW3) 04/2012 - 02/2016
Toyota Prius+ (XW3/XW4) 06/2012 - 01/2015
Toyota RAV4 (XA3) 04/2009 - 05/2010
Toyota RAV4 (XA3) 05/2010 - 02/2013
Toyota RAV4 (XA3/XA4) 04/2013 - 01/2016
Toyota RAV4 (XA3/XA4) 01/2016 - 12/2018**
Toyota Verso (AR2) 04/2009 - 01/2013
Toyota Verso (AR2) 04/2013 - 06/2018
Toyota Verso-S (XP12) 03/2011 - 07/2014
Toyota Verso-S (XP12) 07/2014 - 12/2015
Toyota Yaris (XP13) 11/2011 - 08/2014
Toyota Yaris (XP13) 09/2014 - 03/2017
Toyota Yaris (XP13) 04/2017 - 08/2020
SWC
*vehicles with rear view camera SWC Toyota different vehicles 28Pin USB/antenne/camera > item: 42xty015
**vehicles with 360° OEM camera system SWC Toyota vehicles 10Pin/6Pin/28Pin/24Pin Multilead > item 42xty019
***vehicles without JBL OEM HU
HU application:
Multilead different HU > item: 42arc100
General installation instructions:
Verification:
1: Check all operating functions and vehicle setting functions of the OEM HU.
2: Disconnect the OEM HU voltage-free.
3: Check all interface connections for correctness voltage-free.
Connection and connection sequence:
1: Check settings and hardware configuration of the interface voltage-free.
2: Check configuration of the HU connection cable voltage-free.
3: Connect the HU connection cable according to the operating instructions of the retrofit HU.
4: Connect all other connections according to the operating instructions of the retrofit HU.
5: Connect the entire installation to the vehicle with the main connection last.
6: Software configuration of the interface according to the instructions in the item text and in the manual.
7: Configure the retrofit HU according to the operating instructions of the retrofit device steering wheel remote control/camera/handsfree kit/antenna phantom powering and others.
8: Function test of steering wheel remote control and vehicle
Changes to the configuration of the interface and the HU connection cable:
1: Change configuration voltage-free
2: Reconnection see above 5 to 8
In case of malfunction of the interface or the vehicle:
1: Reinstall the OEM HU
2: Operate the OEM HU
3: Establish CAN bus shut down
4: Check the hardware configuration of the interface
5: Reconnection after CAN Bus shut down see above 5 and 6
More connections, connection changes, alternative connections, connections of loose cables or connection extensions of loose cables specified in the information text or the manual are for orientation purposes only and for the information of trained specialist installer.
More connections, changes to the cable configuration of the wiring harness or use of alternative connections or connection extensions:
1: Connections and changes are to be carried out exclusively by trained specialist installer.
2: Connections and modifications must be checked before connection for any manufacturer approvals or manufacturer warranty conditions that may be affected by the modifications.
3: Connections and modifications must be checked for function and correctness by measuring and comparing them with the vehicle·s cable assignment diagram before connection.
4: Connections and modifications are made on the user·s own responsibility without guarantee of function.
5: Connections and modifications are made on the user·s own responsibility without any guarantee of damage to the vehicle, the retrofit device or the interface.
6: Modifications to the pre-assembled wiring harness may invalidate the product·s warranty.
Цена: 97.77 лв. / 49.99 €